Sequel to the last Terraform Azure Project - Deploying 3 Tier Application o Azure App Service via Terraform, this project won't be deploying to Azure App Service but will guide you on setting up your environment, in this case, an Ubuntu 20.04 virtual machine, and configure the Virtual Machine with a webserver (Nginx),install dependencies for your app like NodeJs directly from terraform by passing on your bash script.
Set Up Azure Service Principal
Let's get started with setting up our authentication to Azure using service principal by running the following command on your terminal. Before this you, you should have installed Azure CLI on your machine and also have an Azure Subscription. With az login, you will be able to log in to your Azure Account. az account list will list your subscription details, you will need to set a default subscription (optional).
The last command will output your app id (to be used as client_id) and password (to be used as client_secret).
az ad sp create-for-rbac --role="Contributor" -- scopes="/subscriptions/xxxxxxxxxxxxxxxxxxxxxxxxxxxx"
Set Up Terraform Files
In your project, create providers.tf where you will list all providers needed for the project. I do like to split my script into different files for clarity. I also have main.tf, variable.tf, terraform.tfvars, output.tf and lastly network.tf. I also have a folder called scripts and one file in this folder called init.sh. this is peculiar to this project as need to pass on a bash script to the webserver to set up node.js and npm.
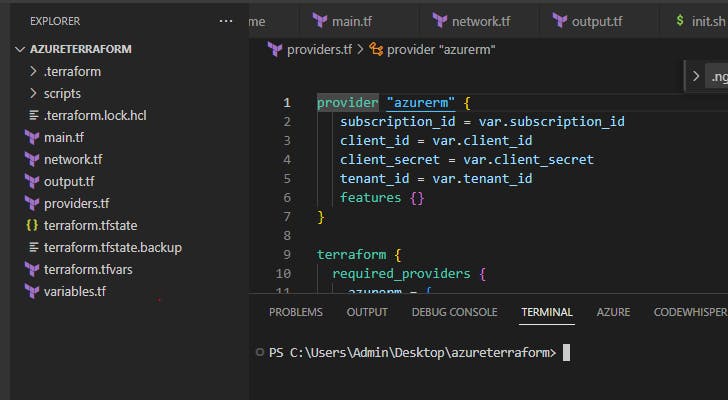
Here is a link to this github repo - github.com/ChisomJude/Terraform-Setup-Ubunt..
Let's start with the providers.tf. Azurerm is the main provider for this project. We will need subscription_id, client_id,client_secret, tenant_id. All these details have been fetched previously and these values will be stored in our terraform.tfvars
provider "azurerm" {
   subscription_id = var.subscription_id
   client_id = var.client_id
   client_secret = var.client_secret
   tenant_id = var.tenant_id
   features {}
}

terraform {
  required_providers {
    azurerm = {
      source  = "hashicorp/azurerm"
      version = "3.6.0"
    }
  }
}
terraform.tfvars stores default values which will be automatically picked instead of requiring console input.
resource_group_name     = "terraformproject2"
location = "eastus"
subscription_id = "xxxxxxxxxxxxxxxxxxxxxxxxx"
client_id = "xxxxxxxxxxxxxxxxxxxxxxxxxxxx"
client_secret = "xxxxxxxxxxxxxxxxxxxxxxxxxxxxxxxx"
tenant_id = "xxxxxxxxxxxxxxxxxxxxxxxxxxx"
instance_size = "Standard_F2"
environment = "prod"
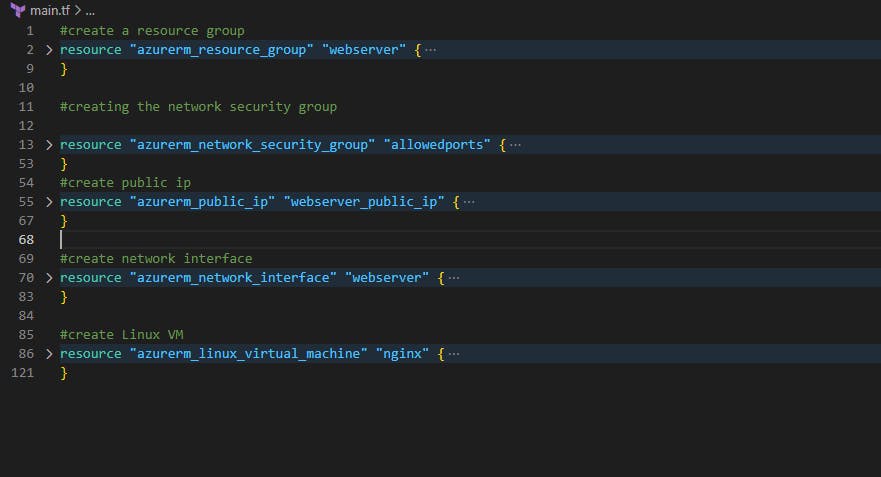
main.tf consists of all the resources to be created, It's quite long you may need check the github -
We created a Resource Group, Network Security Group, Public IP, Network Interface, and finally the Virtual Machine.
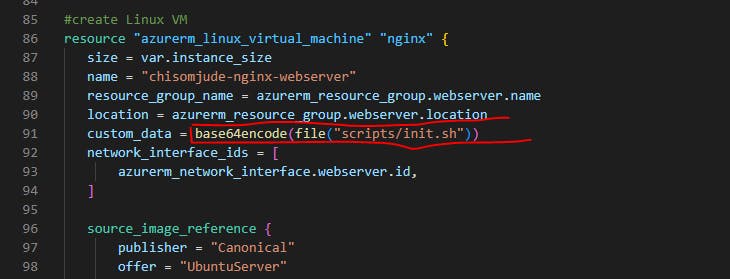
On creating the VM, we referenced a script/init.sh in base64encode , you will need to create the folder and file init.sh where you will include all your bash script to configure the webserver
Here is a copy of my init.sh. This will differ depending on the web server, and project requirements you need to execute. For this example, I will be installing Nginx and Nodejs and cloning a ReactJS project form Github.
#!/bin/bash
sudo apt-get update
sudo apt-get upgrade

#install NodeJs 18/npm
sudo apt-get install curl
curl -fsSL https://deb.nodesource.com/setup_20.x | sudo -E bash -
sudo apt-get install nodejs

sudo apt-get update
sudo apt-get upgrade
#install nginx
sudo apt-get install -y nginx
systemctl start nginx
#git clone the app and cd into the app to install NPM
git clone <github project url>
cd <github project folder>

npm install
npm run build
npm run start
#navigate to uripaddress:3000
back to our defaults, we have network.tf which contains the network module
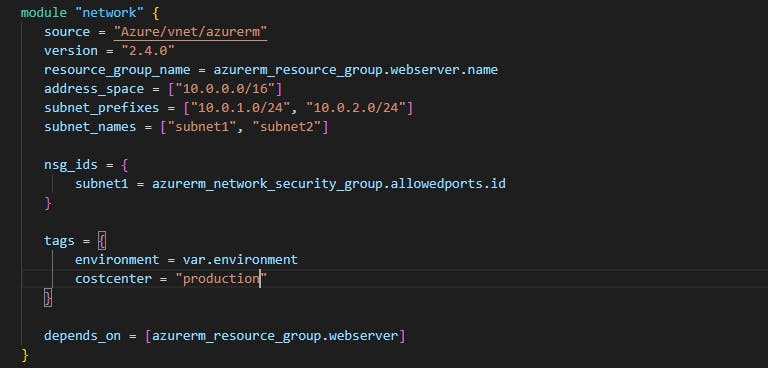
Also, we have the variable.tf, these are variable names, variable types and descriptions
variable "resource_group_name" {
  type        = string
  description = "RG name in Azure"
}
variable "location" {
  type        = string
  description = "RG location in Azure"
}
variable "subscription_id" {
   description = "Azure subscription"
}
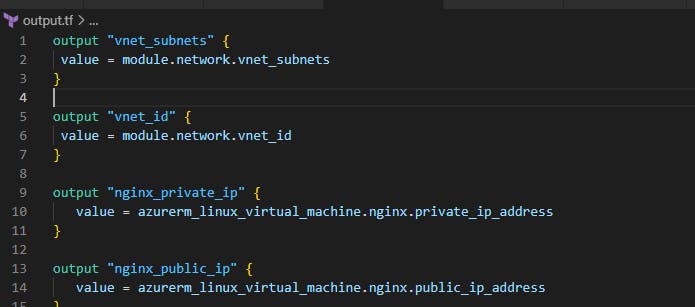
and the output.tf where we specify the output we need terraform to display to the console
Run Terraform and Test
At this point we are all set, to initialize the project and run the Terraform apply command. Ensure to run this on your project folder terminal
terraform init
terraform plan
terraform apply
Once this is fully executed, you will see the output on the terminal this will include the nginx_public_ip address, with which you can navigate to view your project on the browser or ssh into the VM.
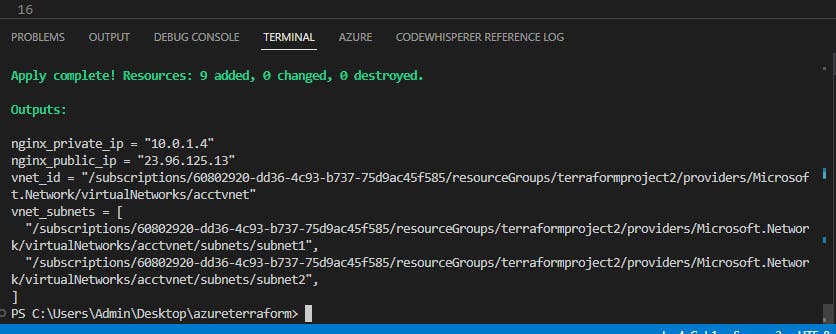
Once deployment is complete, you should be able to see Nginx welcome page when you access your public ip or your project if you had this configured already.
If you find this helpful, drop a like and star the Github project Repro
Challenges Encountered
Ubuntu 18.04 is readily available in Terraform Azurerm docs but isn't compatible with NodeJs 18 (latest version), hence I need to install Ubuntu 20.04 using the following instead. The VM size will also differ.
  source_image_reference {
       publisher = "Canonical"
       offer = "0001-com-ubuntu-server-focal"
       sku = "20_04-lts-gen2"
       version = "Latest"

   }
replaced with these from the documentation
 source_image_reference {
    publisher = "Canonical"
    offer     = "UbuntuServer"
    sku       = "16.04-LTS"
    version   = "latest"
  }
References:
https://github.com/ChisomJude/Terraform-Setup-Ubuntu20.04-and-Nginx-for-ReactApp
https://registry.terraform.io/providers/hashicorp/azurerm/latest/docs
